DIY // secrets of the at home manicure.
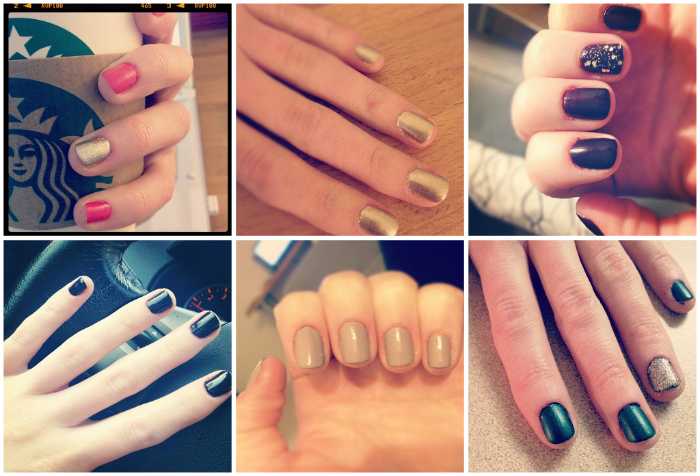
I’m really not at all exaggerating when I say that I am obsessed with having manicured nails. I believe that nothing can go right on a day when my nails aren’t painted and chipped nail polish stresses me out. Okay, now that you all think I’m totally crazy, but I think this obsession has given me some pretty good skills in the manicure department (considering I paint my nails at least 3x a week). After constantly trying to coach others and share this wonderful skill I’ve acquired over the years, I decided to just put it all out there – the secrets of the DIY manicure.
Supplies:
The products you use for your manicure will have a direct impact on the end results, ranging from how your nails look to how long your polish lasts without chipping. Here’s my current lineup which I’ve been rather pleased with:
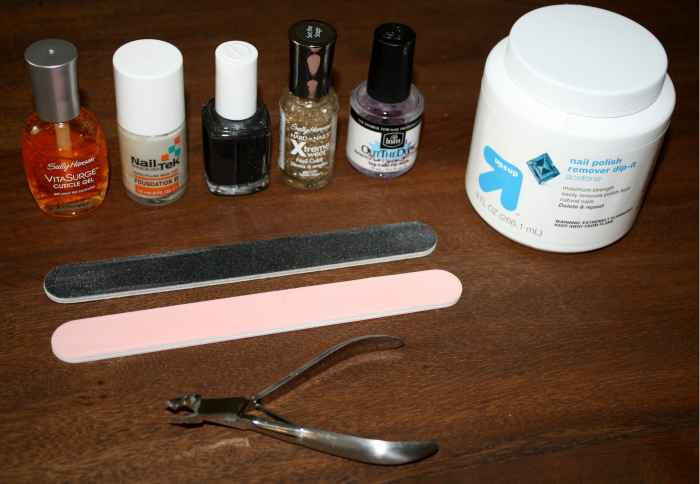
– Acetone Nail Polish: I’m loving Target’s “Nail Polish Remover Dip-It”, it gets the job done without the hassle of dealing with cotton balls and a bottle of polish. I’ve found that acetone nail polish remover is much quicker and takes the polish off all at once without just smearing it around like the non-acetone formulas can. Warning: this will dry out your hands and cuticles, so it’s important to wash & moisturize afterwards.
– Cuticle Nippers: Fairly self explanatory, a good pair of cuticle nippers allows you to trim with precision – it’s important to replace these when they start to dull to eliminate the risk of tearing your cuticles with a dull scissor.
– Cuticle Gel: Sally Hansen’s cuticle gel is the best I’ve used and I love that the applicator brush also allows you to push back your cuticles as you apply. No more need for those wooden sticks!
– Nail Files: I use a coarse nail file when I’m looking to shorten nail length, followed by a fine file to smooth out edges and shape the nail.
– Base Coat: This is a product that is often overlooked – it’s important to protect and moisturize your nail while prepping for polish and smoothing out any ridges. I’ve been using a Nail Tek product but I’m not totally in love – anyone have any other recommendations?
– Top Coat: Your manicure basically doesn’t stand a chance without a top coat. I swear by a product called “Out the Door” – it’s fast drying and does an amazing job protecting against chips while making your polish super shiny.
– Nail Polish: Well, duh. Don’t skimp on polish. I know a cheap bottle of nail polish can be very alluring but it’s never a very good idea. Sally Hansen’s Complete Manicure line is my absolute favorite – the color lasts and the shape of the brush makes application super easy.
Tips & Tricks:
– In a rush? Now is not the time to do your nails. You may think they’re dry and you’re good to go, but trust me, you’re not. You’ll end up with a smudged mess that will be worse than whatever you started out with.
– “I can’t sit still for that long” – meet Twitter and Pinterest, your new best friends. Sit down at your computer, paint your nails and indulge in some internet time.
– Two words: thin coats. One coat of base coat, 2-3 coats of polish depending on how opaque the color is, 1 coat of top coat. Thin and even. Don’t try and glob on a thick coat to get better coverage, it’ll never dry correctly.
– Go easy on your cuticles. The last thing you want is to cut yourself and end up with an infection. Prep your cuticles for trimming by first soaking your fingers in hot water, then apply a cuticle gel. Let the gel sit for a few minutes before pushing your cuticles back and then trim as necessary.
– Practice makes perfect. Trust me, it takes time to get good at this. There will be plenty of times where your left hand turns out perfect meanwhile your right hand is a total disaster. Go slow and stick with it and I promise it’ll get better.